How do I use the image manager?

Text Version

In this tutorial we will be exploring the JCE image manager. This is a very powerful, fully functional image manager.
At this point we are in a content item. Begin by clicking the image manager icon.

In this tutorial we will be exploring the JCE image manager. This is a very powerful, fully functional image manager.
At this point we are in a content item. Begin by clicking the image manager icon.

First let's insert an image into the content item. Choose the folder to select the image from.

First let's insert an image into the content item. Choose the folder to select the image from.

Then select the image.

Then select the image.

Then click the Insert button.

Then click the  Insert button.

The image has been inserted into the article. Let's go back to the image manager.

The image has been inserted into the article. Let's go back to the image manager.

Now let's create a new folder.

Now let's create a new folder.

Enter the name of the folder and click OK.

Enter the name of the folder and click OK.

Now let's go into the folder and upload a new image.
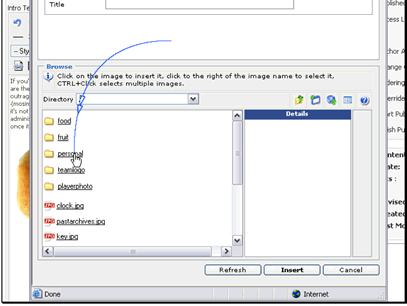
Now let's go into the folder and upload a new image.

Browse to select the image.
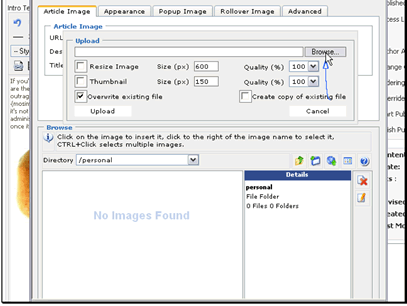
Browse to select the image.

Select the image and click Open.

Select the image and click Open.

You can automatically resize the image while it uploads.
You can also create a thumbnail image and change the image quality

You can automatically resize the image while it uploads.
You can also create a thumbnail image and change the image quality

Then click Upload.

Then click Upload.

Now we can delete the image. Click the image name.

Now we can delete the image. Click the image name.

Then click the delete icon.

Then click the delete icon.

Confirm you want to delete it.

Confirm you want to delete it.

It has been deleted.
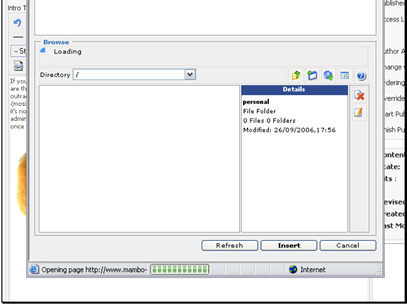
It has been deleted.

When inserting an image you can also change many options
You can change the URL of the image
You can also change the description and title of the image
Let's move on to the Appearance tab
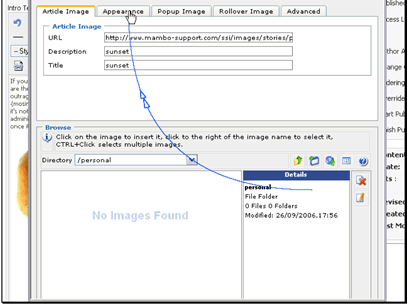
When inserting an image you can also change many options
You can change the URL of the image
You can also change the description and title of the image
Let's move on to the Appearance tab

You can set the image alignment
Default - No alignment is set. The image gets inserted before the cursor on it's own line
Baseline - The image will be inserted before the cursor with a ox of text middle-aligned with the bottom of the image
Top - Inserted before the cursor with one line of text aligned to the top of the image
Middle - Inserted before the cursor with one line of text middle-aligned with the image
Bottom - Inserted before the cursor with one line of text aligned with the bottom of the image
TextTop - Inserted before the cursor with one line of text middle-aligned with the top of the image
Absolute Middle - Inserted before the cursor with one line of text middle aligned with the image
Absolute Bottom - Inserted before the cursor with one line of text middle-aligned with the bottom of the image
Left - Inserted at the beginning of the paragraph with the text wrapped to the right of the image
Right - Inserted at the beginning of the paragraph with the text wrapped to the left of the image
You can choose a CSS class for the image
You can also change the dimensions of the image
You can change the spacing of the image
You can change the size of the border of the image
You can also set CSS styling to use for the image
Let's move on to the Popup Image tab
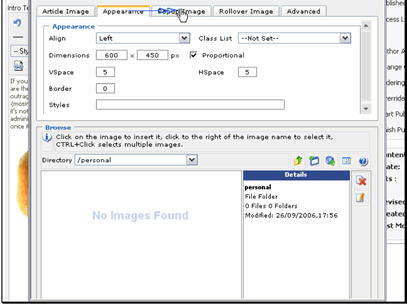

If you want to create the image as a thumbnail with a popup you can set that up here.
Let's move on to the Rollover Image tab
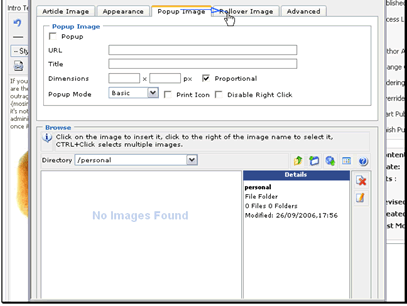
If you want to create the image as a thumbnail with a popup you can set that up here.
Let's move on to the Rollover Image tab

If you want to create a rollover image you can set the mouse over and mouse out images.
Let's move on to the Advanced tab

If you want to create a rollover image you can set the mouse over and mouse out images.
Let's move on to the Advanced tab

You can set the id of the image
You can set the language direction and code used in the image
You can set image map info
You can also set a long description for the image

You can set the id of the image
You can set the language direction and code used in the image
You can set image map info
You can also set a long description for the image

  • 0 Users Found This Useful
Was this answer helpful?

Related Articles

How do I install a language?

Text Version In this tutorial we will be installing a language pack for JCE. Begin by...

How do I use JCE Editor?

Text Version In this tutorial we will be going over general usage in JCEThe first thing we...

How do I configure JCE Editor?

Text Version In this tutorial we will be exploring the JCE configuration. Navigate to...

How do I edit the layout?

Text Version In this tutorial we will be editting the layout of JCE. Begin by navigating to...

How do I install JCE Editor?

Text Version In this tutorial we will be installing the JCE editor. There are 2 parts to the...